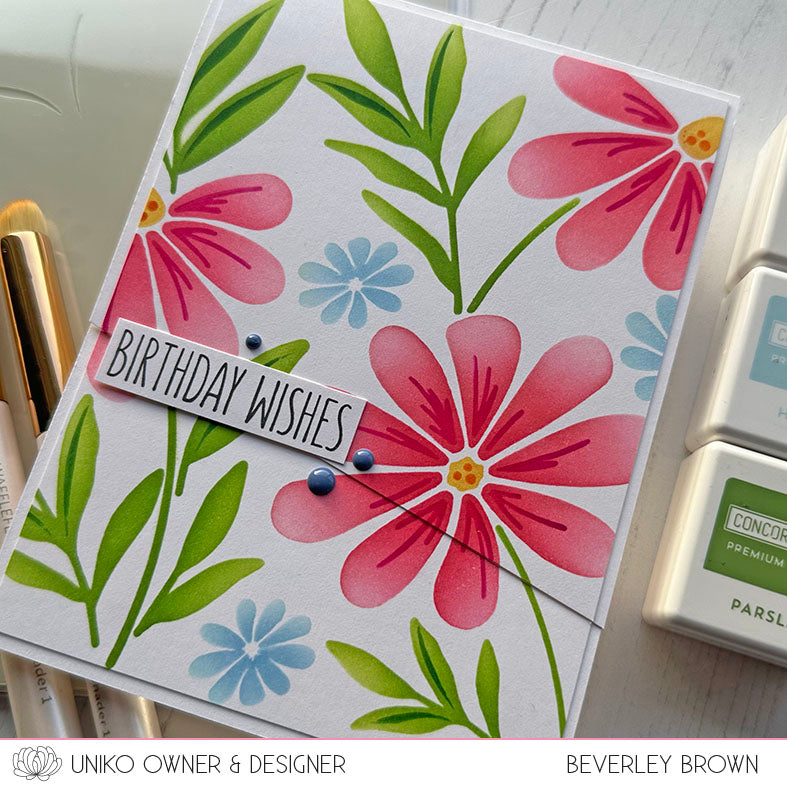
January 2025 Release - Introducing... Layering Picked Posies Stencil

Hello & Happy New Years Eve
I know it's a super busy time of year with all the celebrations, family & friend time. But I couldn't resist ending the year and starting the New Year with some new products. Hopefully you saw the sneak peeks I shared HERE yesterday, but if not be sure to go check them out.
Hopefully you have hopped on over from HERE where I have given a little intro to this stencil.
Let's have a look at this stencil in action...

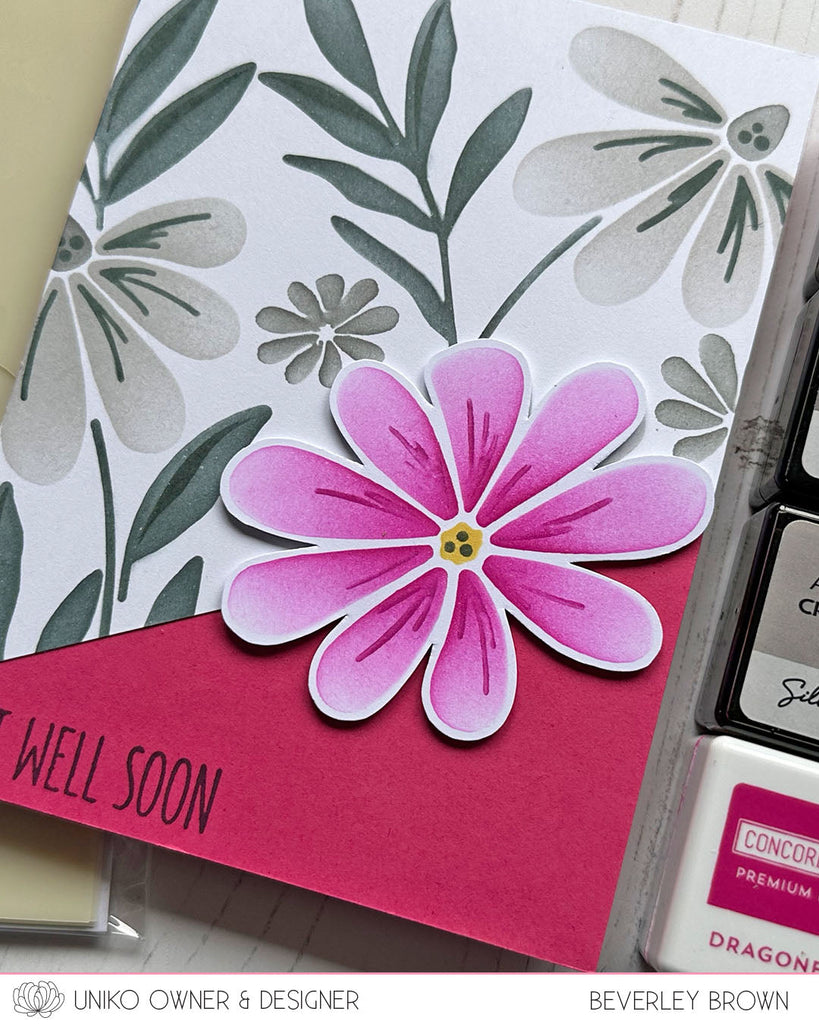
This first card was one that we made in the Uniko Autumn Stamping Retreat and this stencil was actually the free gift all the attendees received! A good reason to come to a Uniko Stamping Retreat is the free gift from a recent or up coming release 😉
For this first card I went for a top folding card with a fun angled opening. I can't take credit for this card layout, it was one I came across on social media, I think Gina K's feed.

I used all 4 layers of the stencil for this card starting with the leaves in Sprout, Parsley & Evergreen which is added using the details layer. I then moved to the flowers which I inked in Honeysuckle and the detail added in Dragonfruit. The smaller flowers and centre of the flowers are on a separate layer and they are inked in Harbor and Buttercup respectively.

Lastly I finished the design with the Happy Birthday sentiment from Floral Vines and a trio of Blueberry enamel dots.
Next up I have a simple card using just a section of the stencil.

This card took a little masking on each of the layers, but the result is a beautiful CAS design. The colours I used for the flower are my favourite Oceanside and Peacock, Buttercup & Spiced Cider. The stem and leaves Sprout, Parsley & Evergreen.

I trimmed the panel so that the Oceanside card base would show and I finished with the Thank You sentiment from Everyday Sentiments and a few Peacock enamel dots.
Lastly for today I went for another simple design using all 4 layers of the stencil..

For this card I used Grapefruit & Sorbet for the flowers then Avocado, Artichoke & Evergreen for the leaves.
This time I adhered the trimmed panel with foam tape and also added the Happy Birthday sentiment stripe with foam adhesive.

That's all from me here today, but why not join me over on the Uniko YouTube Channel HERE for a closer look at the stencil and more inspiration.
I hope you love this stencil as much as I do AND as it is New Years Eve, I'll be giving one set of the stencils away to one lucky comment left on any of the blog posts & or across Uniko's social media posts to win this stencil set.
Happy hopping & see you in 2025!
Crafty Hugs
comments ( 6 )
Just love these cards Bev. These are so beautiful and colourful, perfect for so many occasions. Great stencil. I think I need more C9 inks in my stash.



Oh my goodness—I HAVE to have this stencil set! Don’t suppose the year of stencils goes through January—haha! Absolutely love the stencil set and love your color combos! In fact, I have a list of your CN9 combos as I have the inks. Happy New Year!